
Hello Lovely Crafters! How are you? Today I’m sharing 5 cards using the gorgeous Whimsy and Wonder suite from Stampin’ Up! You may have seen me use this suite to create a gorgeous z-fold card a few weeks ago (you can see that HERE), but today I’m going to be creating 5 different cards, from a simple present card to a slightly more complex wreath card.
I love the unusual colours in this suite, and saw so much potential in it that I have another 5 Ways with video for this suite lined up! So if you love this one too, you’ll have plenty of inspiration to craft along with!

Whimsical Trees Bundle (English) [156810] £47.50

Whimsy & Wonder 12″ X 12″ (30.5 X 30.5 Cm) Specialty Designer Series Paper [156329] £14.00
Unfortunately I lost a chunk of the video footage for these cards, so I will add written instructions for how to create the below cards to go alongside the video. The video for the rest of the cards is below.
Bauble Card Tutorial
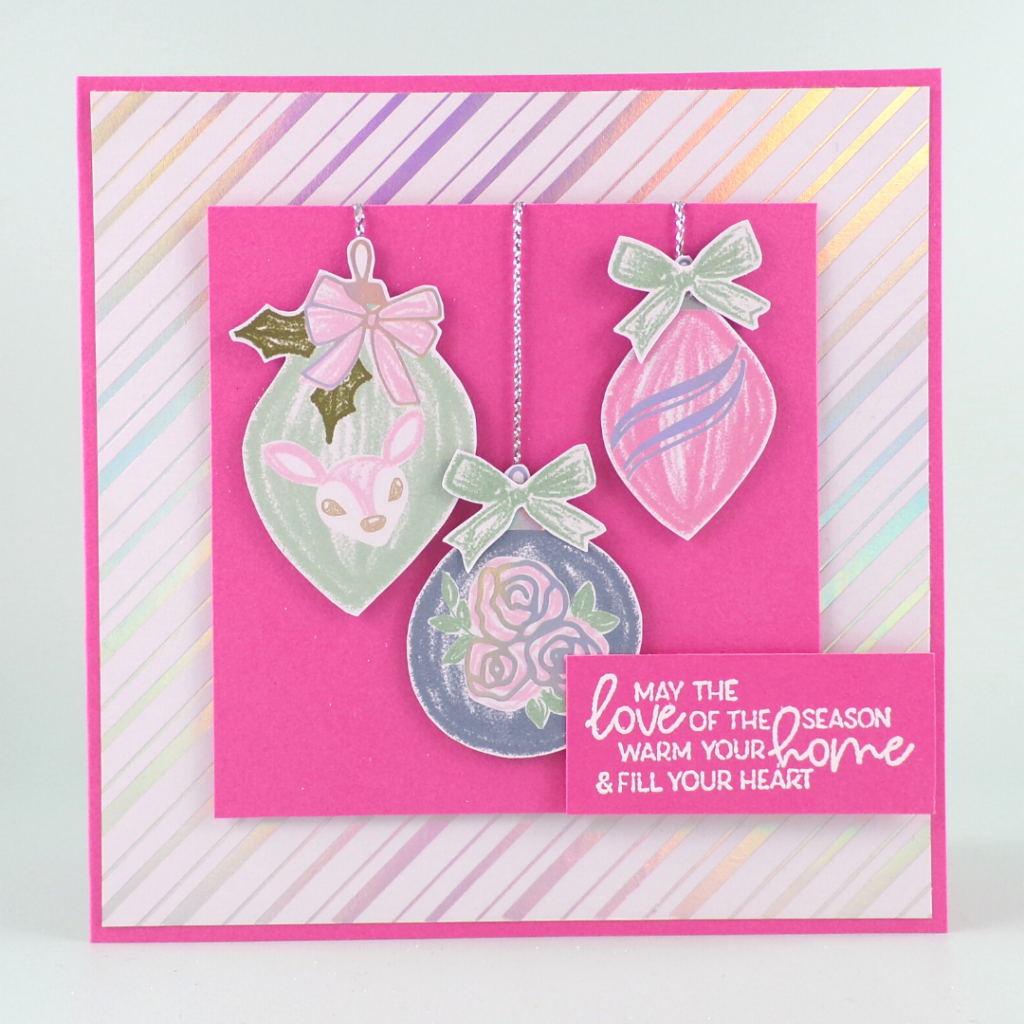
Layers: 5″ square Polished Pink Card Blank, 4 3/4″ square piece of Whimsy and Wonder DSP, 3″ square piece of Polished Pink cardstock.
Cut some of the baubles and bows from the Bauble DSP.
Add some of the silver Elegant trim onto the 3″ square of Polished Pink cardstock, attaching with glue dots at the back of the cardstock and underneath where the baubles will be.
Pop the baubles up on Stampin’ Dimensionals at the end of each of the strings, then add the cut-out bows to any baubles that don’t already have them.
Add the bauble panel to the front of the card with Stampin’ Dimensionals, then heat emboss a sentiment using white embossing powder onto a scrap of Polished Pink cardstock and add that with dimensionals too.
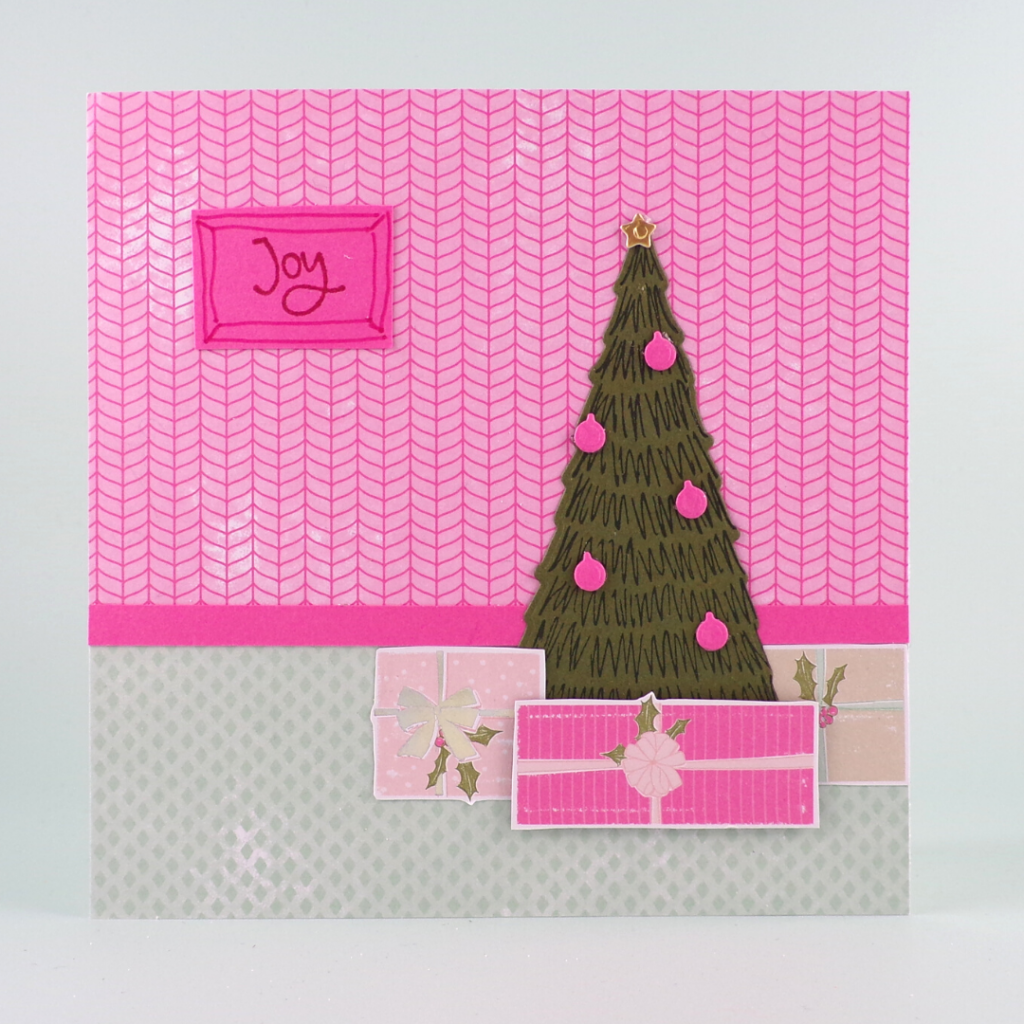
Christmas Tree Card Tutorial
The end part of this tutorial is on the video, but I will add written instructions here as the first part is missing.
Take a 3 1/4″ x 5″ piece of the pink DSP from the pack and a 1 3/4″ x 5″ piece of the green DSP, and adhere them to a 5″ square Basic White card blank as shown in the picture. Cover the join with a 1/4″ x 5″ piece of Polished Pink Cardsrock.
Use Evening Evergreen ink to stamp the tree onto Mossy Meadow cardstock, then cut it out with the coordinating die. Add the tree to the card front, then decorate it with baubles die-cut from Polished Pink cardstock and a star die-cut from gold foil sheet.
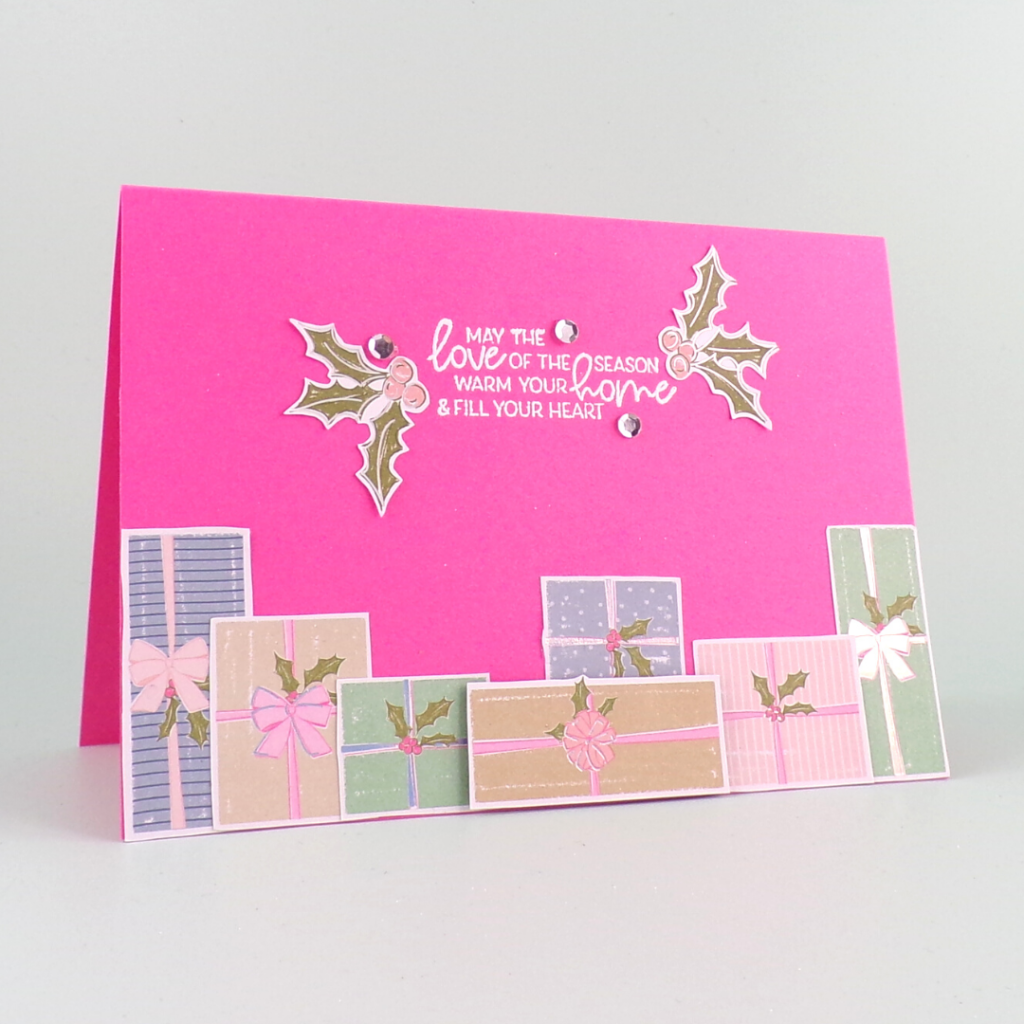
Cut 3 presents from the present DSP and add them to the bottom of the tree, popping the middle one up on Stampin’ Dimensionals (foam pads).
Using Melon Mambo ink, stamp the “joy” greeting onto a scrap of Polished Pink cardstock, then hand-draw a frame around the outside with the coordinating Stampin’ Write Marker. Cut around the frame and then add it to the “wall” on your card.
Video Tutorial – 5 Ways to create Handmade Christmas Cards with Whimsy and Wonder

I hope you enjoyed this project. Click the links below to shop the products used to make it.
JOIN MY TEAM Product List 
 Shimmer Ribbon")


Widget not in any sidebars
The form you have selected does not exist.
Sarah Phelan, Independent UK Stampin’ Up Demonstrator
Sarah Phelan, Independent UK Stampin’ Up Demonstrator