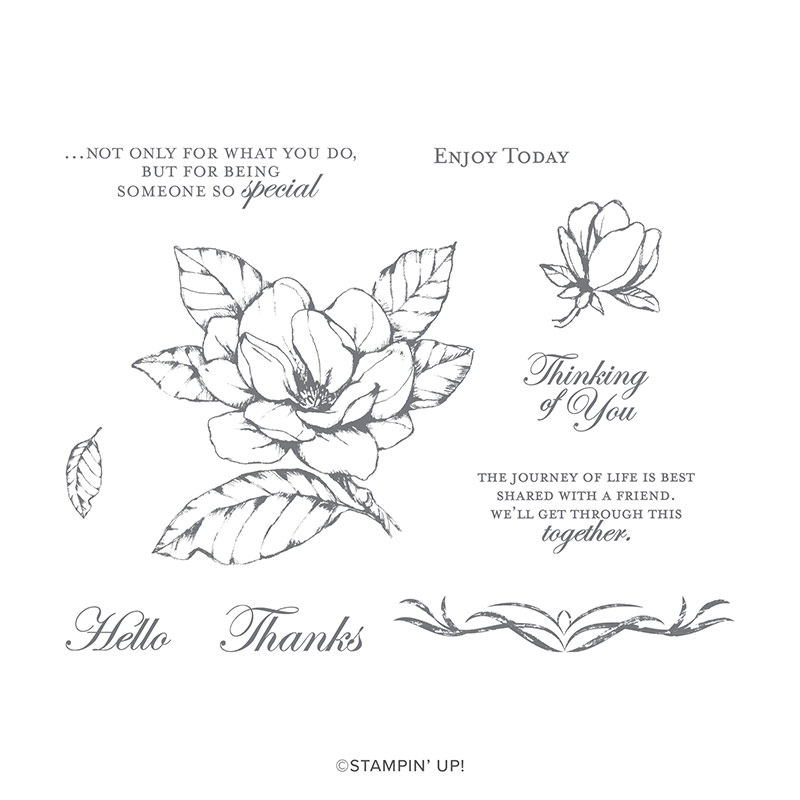
Good Morning Crafters!! How are you this morning? Are you ready for another tutorial from the Stampin’ Up Magnolia Lane suite? This one focuses on the Good Morning Magnolia stamp set and that gorgeous large Magnolia image. I also use the Stitched Nested Label dies that are part of the Bird Ballad suite – I love them and use them all the time!! I would definitely take a look at them if you’re on the lookout for some nested label dies, as the stitching is on the outside as well as the inside of the die, meaning they’re perfect for labels, but also for apertures as they will leave a stitched edge around the aperture, creating a beautiful finish to your card!!
149298
Price: £33.00
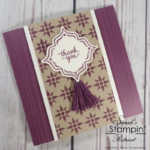
Tutorial – Good Morning Magnolia Handmade Thank You Card
Start your card by creating a card base – cut a 5″ x 10″ piece of Basic Black cardstock and then score and fold it in half.
Cut a piece of Petal Pink cardstock, and a piece of Whisper White at 4 3/4″ square and add the pink piece to the front of the card, and the white piece to the centre. Then, cut a piece of Basic Black cardstock 4 1/4″ square, and a piece of Whisper White 4 1/8″ square.
Stamp the large magnolia image onto the white piece of cardstock with Black Memento Ink, then use your blends to colour it. I used bronze for the stem, the dark and light Mossy Meadow for the leaves, the dark and light Petal Pink to accent the petals, and the dark So Saffron for the centre of the flower. You don’t need to worry about the colouring too much – the stamp actually helps, just colour your darkest colours where there is shading on the stamp!!
Outline the Magnolia with a line of Dark Crumb Cake using your Stampin’ Blend. This will help the flower to look more dimensional.
Stamp and colour the flower from the image twice more on scraps of Whisper White cardstock. Cut the whole flower from the first image, and just the centre four petals on the second image. Layer these on top of your initial floral image with dimensionals to create a 3D flower.
Glue your Whisper White floral layer onto the black layer and then add them to the card using Stampin’ Dimensionals.
Stamp the “Thanks” sentiment from the stamp set onto a scrap piece of Petal Pink cardstock and cut it out using the Nested Label die that best fits around the sentiment. Add the sentiment to the card using Dimensionals to finish!!
I hope you enjoyed this project. Click the links below to shop the products used to make it.
JOIN MY TEAM Product List


Widget not in any sidebars
The form you have selected does not exist.
Sarah Phelan, Independent UK Stampin’ Up Demonstrator
Sarah Phelan, Independent UK Stampin’ Up Demonstrator