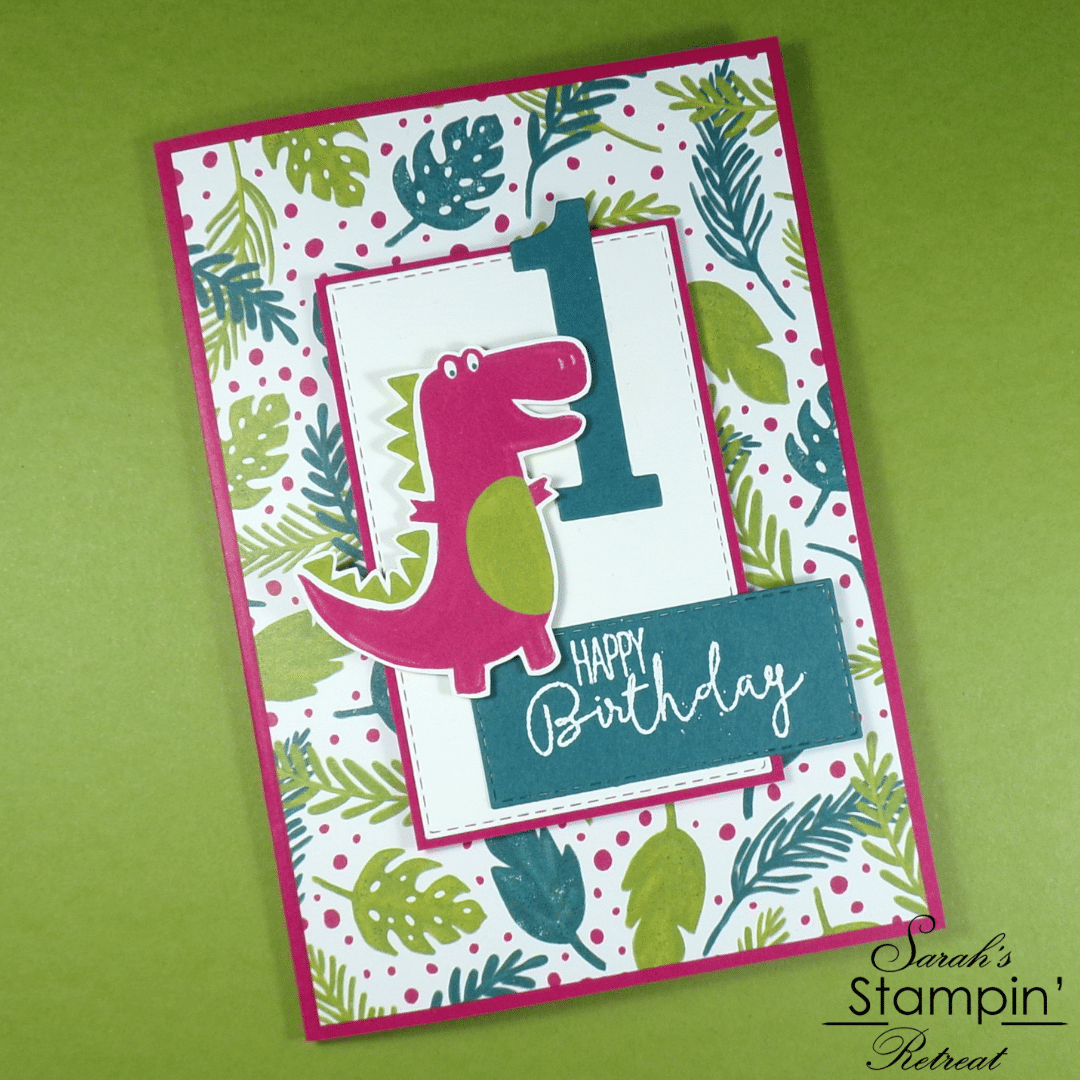
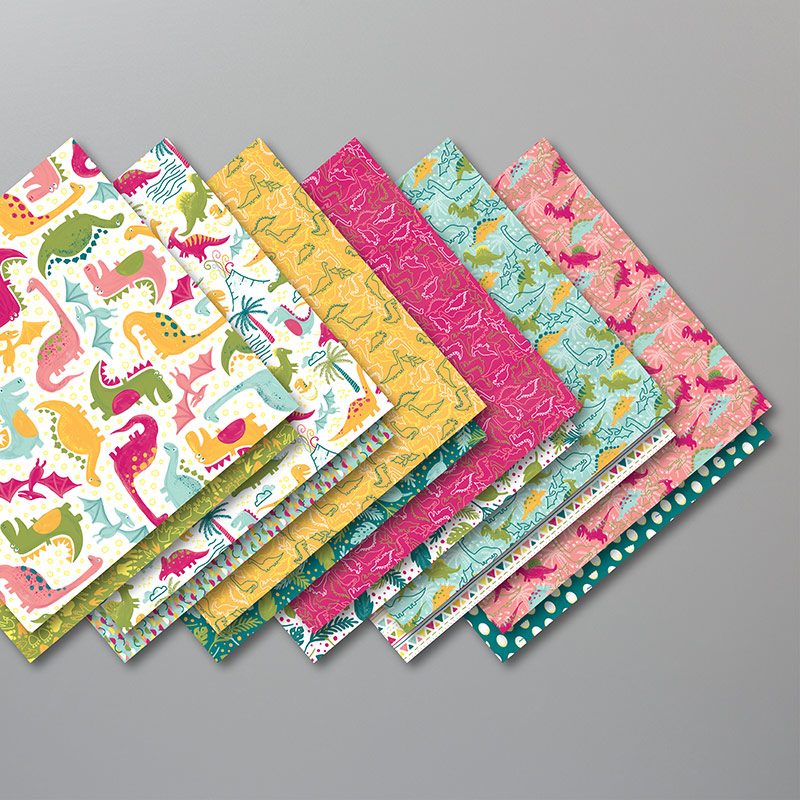
Good Morning Crafters!! So as I mentioned before, I have a few first birthday cards to make this month, so I thought I’d share another one today! I love this Dinoroar paper because it’s great for both boys and girls – it’s really fun! I feel as though you could make this card for most young children and just change the number to their age. There are loads of different dinosaurs on the papers so you could make a ton of different versions in different colours.
149589
Price: £10.75
Tutorial – Dinoroar First Birthday Card
To create your card base, score and fold an A5 piece of Lovely Lipstick Cardstock in half. Cut a piece of Whisper White cardstock, and a piece of the Dinoroar DSP with the leaves on it, each 1/4″ smaller than the card front. Stick the Whisper White piece inside your card, and the leaf piece on the front of your card.
Use the Stitched Rectangle Dies to cut a rectangle out of Whisper White cardstock, then cut a piece of Lovely Lipstick cardstock 1/4″ bigger and layer the white rectangle on top. The number that I’ve used on this card is from a retired set called Large Numbers, but if you don’t have this set you could substitute any number dies that you do own, cutting it out of Pretty Peacock cardstock.
Heat emboss the Happy Birthday sentiment from the Special Celebrations stamp set in White Embossing Powder onto a spare piece of Pretty Peacock cardstock, then cut it out using a small stitched rectangle die.
Cut one of the pink dinosaurs from the Dinoroar DSP (patterned paper) – I fussy cut mine but there are coordinating dies that I will link to in the product listing if you prefer to use a die instead. I also cut out one of the partial dinosaurs that hang off the edge of the paper and stuck this inside the card.
To finish your card, layer up all of your elements as shown in the picture, using Stampin’ Dimensionals to add your rectangle centrepiece and the dinosaur and using glue for the rest.
I hope you enjoyed this project. Click the links below to shop the products used to make it.
JOIN MY TEAM Product List


Widget not in any sidebars
The form you have selected does not exist.
Sarah Phelan, Independent UK Stampin’ Up Demonstrator
Sarah Phelan, Independent UK Stampin’ Up Demonstrator