Good Morning crafters!! How are you? These are strange times but I hope that you’re getting plenty of time to craft?! I haven’t posted for a while as my life has been consumed by workshops and looking after little Elliott, but now that workshops have stopped for a while I’m determined to make the time while Elliott’s in bed to post some of my makes!
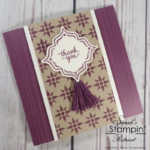
I’ve been playing a lot recently with the Peaceful Moments bundle. It has some really useful sentiments in lovely fonts, and then the most gorgeous layering dies! Today I’ve combined it with the Peaceful Poppies DSP (patterned paper).
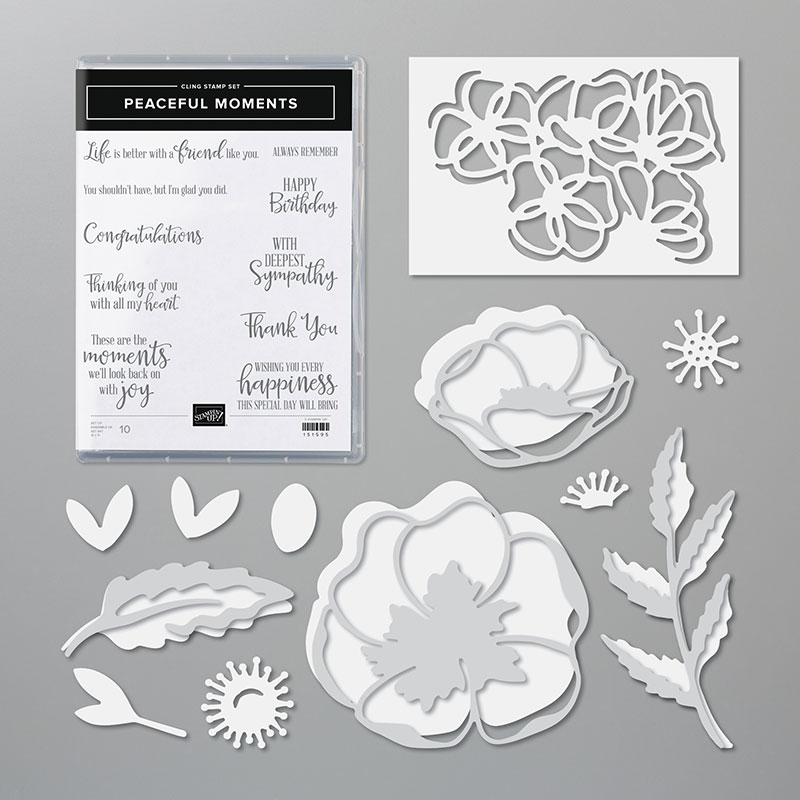
153824
Price: £48.50
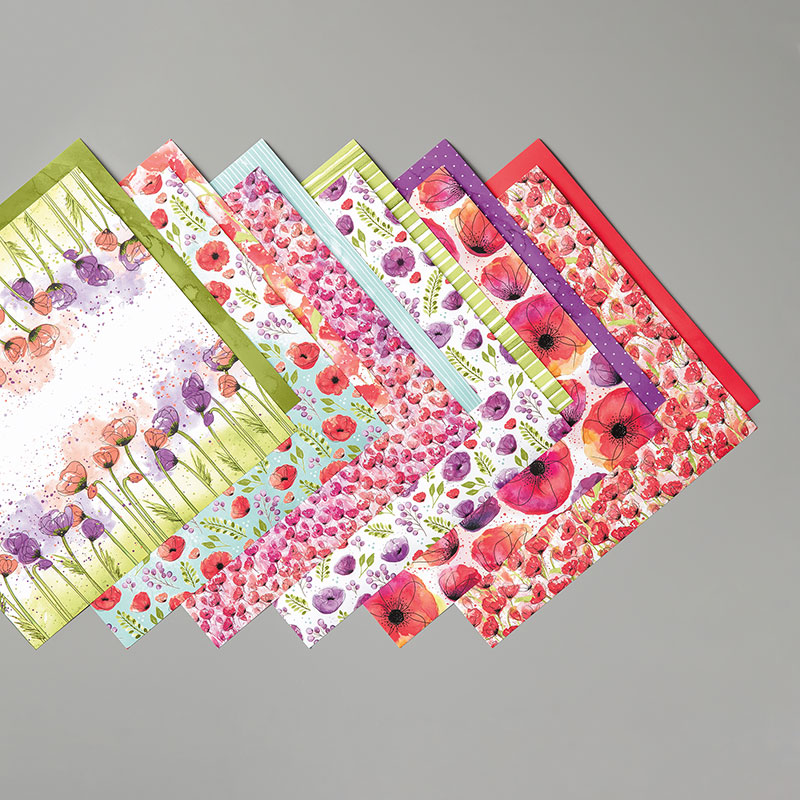
151324
Price: £10.75
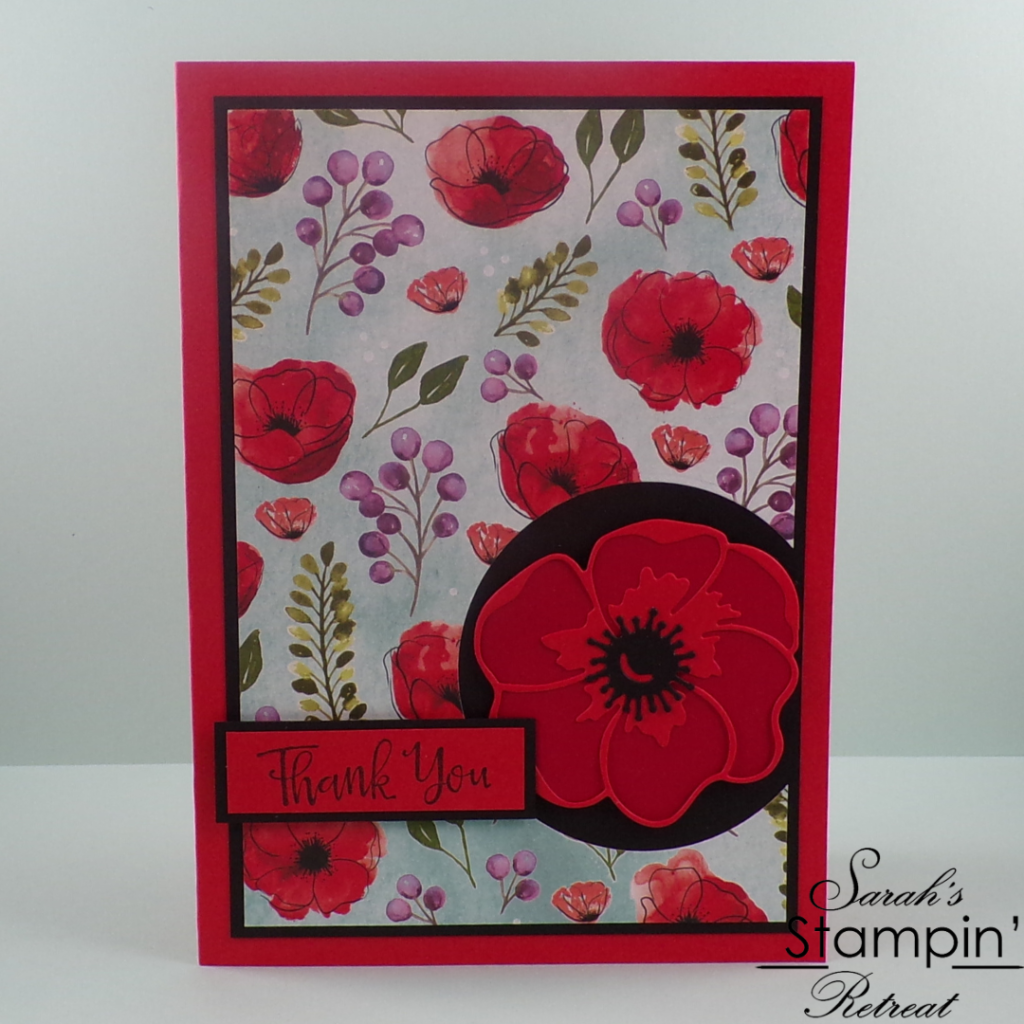
I decided to create this card for the Freshly Made Sketches card sketch challenge. If you’ve never used a card sketch before, they’re great for helping you to design a card. It’s also fun to join in sketch challenges as it’s amazing how many different cards people come up with from the same sketch! You simply use the sketch to determine your layout, but the elements themselves are down to your imagination!

If you want to have a go at making this card, the tutorial and the shopping list are below.
Tutorial – Layered Poppy Handmade Thank You Card
To create your card blank, score a 10″ x 7″ piece of Poppy Parade cardstock in half to create a 5″ x 7″ card blank
Cut a piece of Basic Black cardstock to 4.5″ x 6.5″, then a piece of patterned paper to 4 1/4″ x 6 1/4″.
Use the largest of the Stitched Circles from the Stitched Shapes layering dies to cut a circle out of the side of the patterned paper, then layer both this and the black layer onto the front of your card.
To create the poppy, cut the bottom layer (outline) from Real Red cardstock using the Peaceful Moments dies, then cut the top layer (the detailed piece) from Poppy Parade cardstock. Cut the centre from Basic Black cardstock and then glue all of the layers together. Add this to your card with Stampin’ Dimensionals (foam pads).
To finish the card, stamp the Thank You sentiment from your stamp set onto a spare piece of Poppy Parade cardstock. Cut round it, then cut a piece of Basic Black cardstock 1/4″ bigger and layer your sentiment onto it. Add this to your card using Stampin’ Dimensionals.
I hope you enjoyed this project. Click the links below to shop the products used to make it.
JOIN MY TEAMUntil the 31st March, if you buy the Peaceful Moments bundle (or anything else to the value of £45 or over) you will be able to choose from a large selection of free gifts, ranging from exclusive stamp sets, to patterned paper packs, to embellishments!
Product List")


Widget not in any sidebars
The form you have selected does not exist.
Sarah Phelan, Independent UK Stampin’ Up Demonstrator
Sarah Phelan, Independent UK Stampin’ Up Demonstrator

Beautiful! The paper is stunning and I’m glad the sketch allowed so much of it to show. The rich red flower on black really pops. Thank you for playing along with us at Freshly Made Sketches.
That is a beautiful poppy! And that background paper- gorgeous! Love the bit of purple in it. Thanks so much for joining us at Freshly Made Sketches!