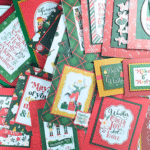
Hello Crafters! How are you today? As you’ll know if you’ve followed my blog for a while, I LOVE colouring, but I don’t like putting in all that effort for it to just sit in a colouring book; I like it to be useful, so doing things like creating my own DSP (patterned paper) is perfect! I created the one for this card with the Poinsettia Petals stamp set. It’s sooo pretty! This is also a great thing to do if your kids are into helping to make Christmas cards – get them to create their own DSP and colour and you can spend hours together creating beautiful things!
If you follow my Instagram (@sarahsstampinretreat) you’ll probably have seen the process photos for this DSP as I posted them as I was creating it. I did all the colouring before I decided on a black background but I think the black makes all the colours pop.

Poinsettia Petals Photopolymer Stamp Set (English) [153475] £25.00
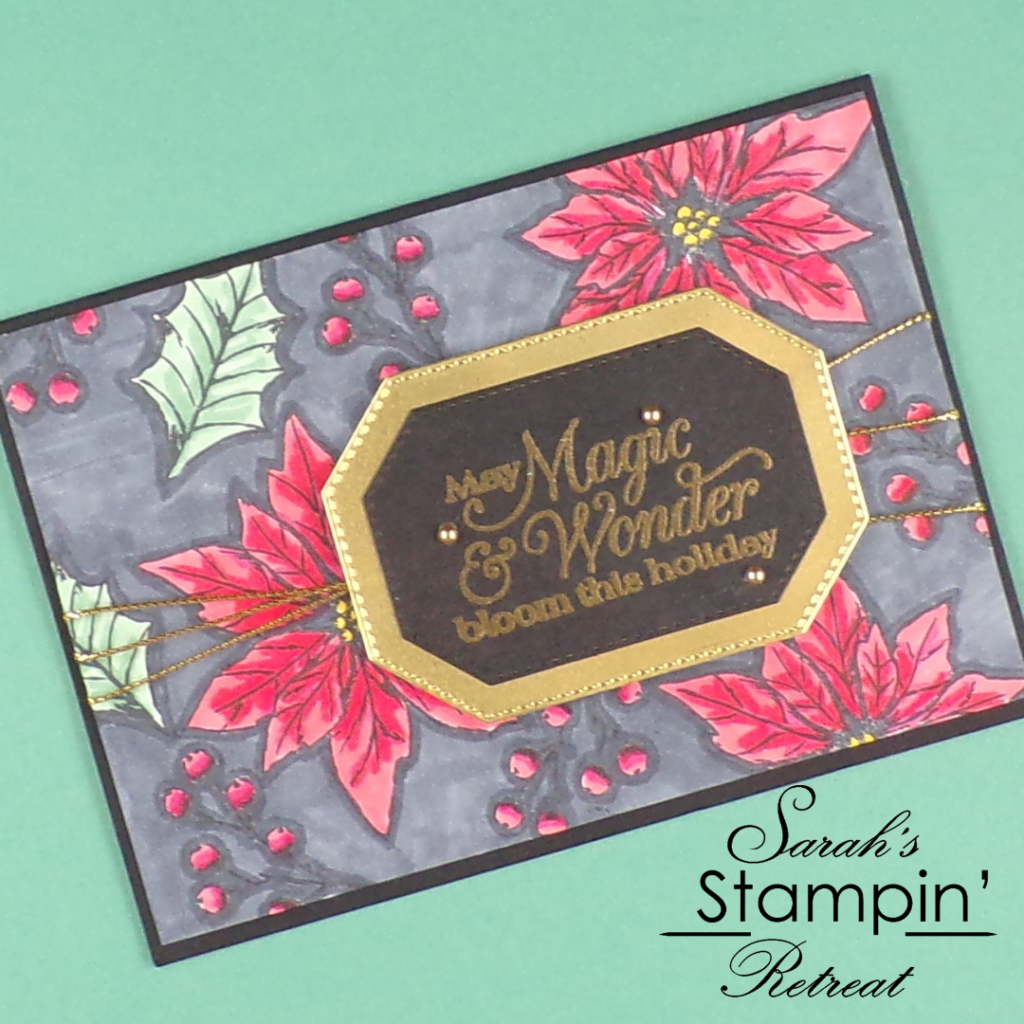
Tutorial – Poinsettia Petals Adult Colouring Christmas Card
To create your card base, score and fold an A5 (5 7/8″ x 4 1/8″) piece of Basic Black Cardstock in half. Then, create a Whisper White layer 1/4″ smaller than your card front (5 5/8″ x 3 7/8″).
Stamp elements from the Poinsettia Petals stamp set all over the Whisper White layer [TIP: Start with the larger images and fill in the gaps with the smaller ones]. Colour the images in with your Stampin’ Blends. Then, if you want the outlined look that I have, outline your images with the dark Basic Black Stampin’ Blend and colour the rest of the background with the light Basic Black, otherwise, just use one of these to colour the background.
Heat emboss your sentiment onto a spare piece of Basic Black cardstock in Gold Embossing Powder [not sure how to do this? see my video tutorial HERE]. Cut it out using the second largest of the Hippo Friends dies, then use the largest one to cut a layering shape from Gold Foil Sheet. Glue the two pieces together.
Add 3 lengths of the gold trim from the Wonder of the Season ribbon combo pack across your coloured DSP, securing the ends at the back with tape or Stampin’ Seal +. Glue this onto your card front, then add your sentiment with Stampin’ Dimensionals to the front of your card. Finish it off with a few gold metallic pearls.
I hope you enjoyed this project. Click the links below to shop the products used to make it.
JOIN MY TEAM Product List


Widget not in any sidebars
The form you have selected does not exist.
Sarah Phelan, Independent UK Stampin’ Up Demonstrator
Sarah Phelan, Independent UK Stampin’ Up Demonstrator