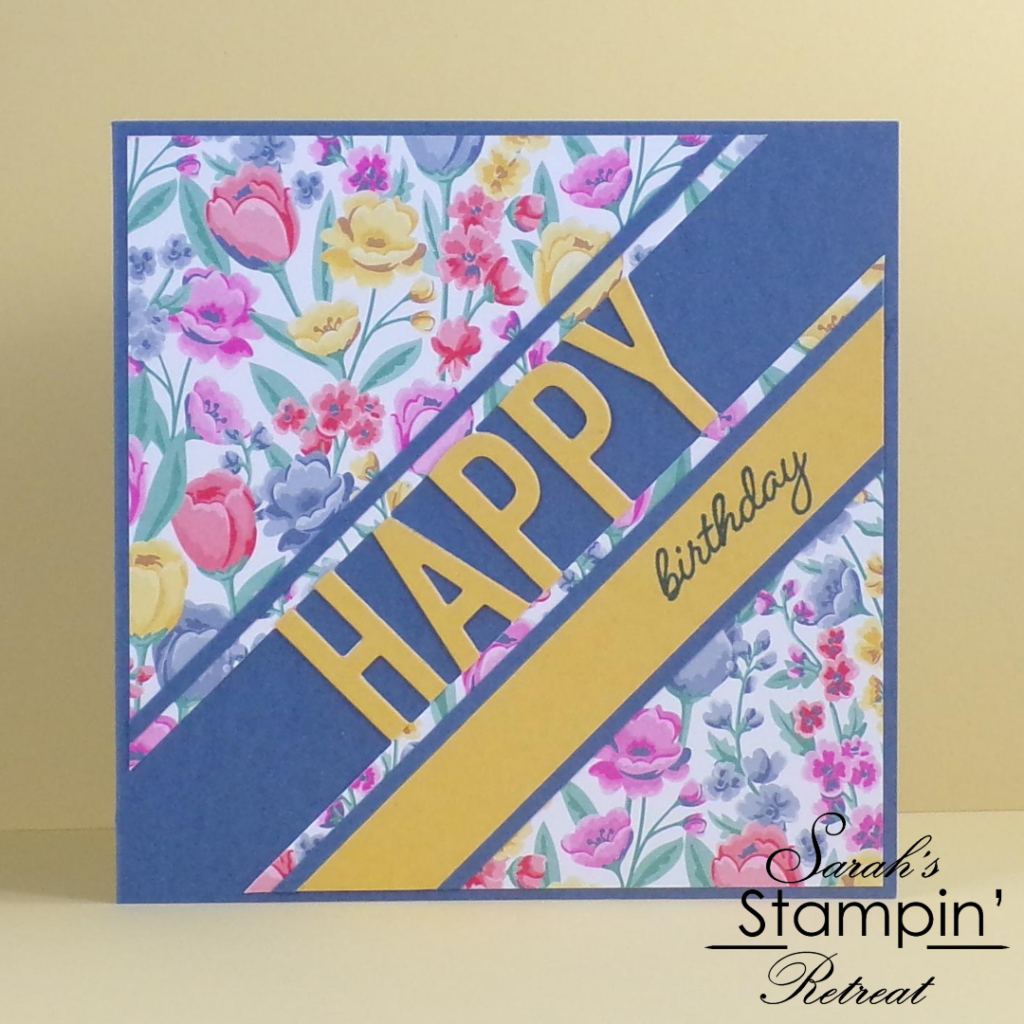
Good Morning Crafters! How are you today? Today’s card combines the So Much Happy stamps and dies with the Flowers for Every Season DSP. I love the contrast of the pretty florals and the graphic nature of the rest of the card it could become a more masculine card really easily just by changing up the DSP!

So Much Happy Bundle (English) [154076] £43.00

Flowers For Every Season 6″ X 6″ (15.2 X 15.2 Cm) Designer Series Paper [152486] £10.75
Tutorial – So Much Happy Handmade Birthday Card
To create your card base, score and fold a 5″ x 10″ piece of Misty Moonlight cardstock in half.
Next, cut a 4 3/4″ square piece of the Flowers for Every Season DSP and use the “Happy” die to cut a diagonal panel out from corner to corner. Cut the “Happy” again from Bumblebee cardstock, then trim the letters away from the panel with your scissors and glue them over the letters on the floral panel.
Stamp the “birthday” word from the coordinating stamp set in Misty Moonlight ink onto a strip of Bumblebee cardstock just wide enough to fit the word. Glue the strip diagonally underneath the “Happy” on your floral panel and trim the excess off the sides.
Cut 3 strips of Misty Moonlight cardstock 1/8″ wide. Glue one on either side of the sentiment strip, then a third one above the “happy”, cutting the excess off in line with the edges of the panel.
Glue your floral panel onto your card front and ta-da! You’re done!
I hope you enjoyed this project. Click the links below to shop the products used to make it.
JOIN MY TEAM Product List 


Widget not in any sidebars
The form you have selected does not exist.
Sarah Phelan, Independent UK Stampin’ Up Demonstrator
Sarah Phelan, Independent UK Stampin’ Up Demonstrator