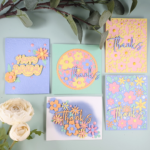
Hello Crafters? How are you today? I’m sooo happy that the Poppy Moments dies that I’ve featured in this card are not only back in stock, but also in the brand new catalogue, so I will continue sharing my creations using it with you for another year! They’re just so gorgeous, and because they’re layering dies you can get lots of depth from them by just using different colours or tones of cardstock.
Product List")
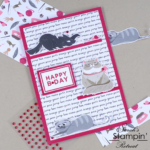
Tutorial – Poppy Moments Handmade Birthday Card with die-cut background
To create the card base, score and fold an A5 piece of Basic Black cardstock in half. Cut a piece of Real Red cardstock 1/4″ smaller than your card front.
Cut some of the detailed poppies from the Poppy Moments die set out of Poppy Parade cardstock and cut the same number of flower centres from Basic Black cardstock. Stick the flowers across your Real Red layer to create a poppy background, and stick a centre in the middle of each flower. Trim the excess bits of the die cuts off the side of the cardstock.
To create the sentiment, heat emboss your Happy Birthday stamp in white on a scrap of Basic Black cardstock [not sure how to heat emboss? watch my video guide here]. Cut it out using one of the dies from the Stitched So Sweetly die set.
Use the Poppy Moments dies to cut out a leaf, cutting the base layer in Granny Apple Green, and the top layer in Old Olive. Glue the two layers together and stick it to the back of your sentiment piece.
Cut a thin strip of Basic Black cardstock (about 1/2″ wide) and glue it across your card front, adding your sentiment on top using Stampin’ Dimensionals.
I hope you enjoyed this project. Click the links below to shop the products used to make it.
JOIN MY TEAM Product List 


Widget not in any sidebars
The form you have selected does not exist.
Sarah Phelan, Independent UK Stampin’ Up Demonstrator
Sarah Phelan, Independent UK Stampin’ Up Demonstrator