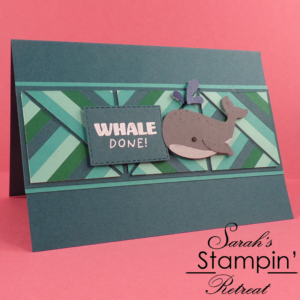
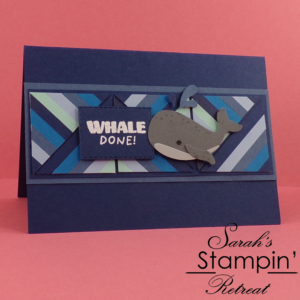
Hello Crafters! How are you today? In today’s video tutorial I’m showing you how to create this cute Whale Done card. I will be showing you how to use up your small scraps of cardstock to create the lovely tile-effect background (I adapted this from a fab technique taught to me recently by my Stampin’ Up! upline, Amanda Fowler), and how to build up the lovely punched whale (also from cardstock scraps) which is part of the totally cute Whale Done stamp and punch bundle.

Whale Done Bundle (English) [154053] £29.50
I do love a pun in a stamp set – I feel like it just adds a really fun feel to your cards! Keep an eye out for a card made using the coordinating papers soon – I’ve not made one yet but it’s definitely on my To Do list!!
Read on after the video tutorial to find the card dimensions and the full shopping list.
Video Tutorial – Whale Done and the Tile Technique
Dimensions
Card Blank – A5 (5 7/8″ X 8 1/4″) sheet of cardstock (I used Night of Navy for the original card, and Pretty Peacock for the one I made in the video), scored and folded in half
Wider strip across the front of the card – 5 7/8″ x 2 1/4″
Slimmer strip across front of card – 5 7/8″ x 2″
White piece of cardstock to back tiles – 2.5″ x 5″
Scraps to form tiles – 1/4″ x at least 5″
I hope you enjoyed this project. Click the links below to shop the products used to make it.
JOIN MY TEAM Product ListWidget not in any sidebars
The form you have selected does not exist.
Sarah Phelan, Independent UK Stampin’ Up Demonstrator
Sarah Phelan, Independent UK Stampin’ Up Demonstrator


